Match Font With Keyboard Word For Mac
| 1. Frequently Used Shortcuts | |
|---|---|
| ⌘+Z or Ctrl+Z | Undo the last action |
| ⌘+X or Ctrl+X | Cut selected text or graphics |
| ⌘+C or Ctrl+C | Copy selected text or graphics to the Clipboard |
| ⌘+V or Ctrl+V | Paste the Clipboard contents |
| Option+⌘+G | Choose the Go To command (Edit menu) |
| Option+⌘+L | Open the Spelling and Grammar dialog box |
| F8 | Extend a selection |
| ⌘+` (Grave accent) | Go to the next window |
| ⌘+Shift+S | Choose the Save As command (File menu). |
| Shift+F2 | Copy selected text |
| Shift+F3 | Change letters to uppercase, lowercase, or mixed case |
| Ctrl+F for Find; Ctrl+H for Find and Replace | Find or Find and Replace |
| ⌘+P or Ctrl+P | Print a document |
| Shift+F5 | Move to the previous insertion point |
| ⌘+Shift+` (Grave accent) | Go to the previous window |
| Shift+F7 | Open the Thesaurus pane |
| Shift+F8 | Shrink a selection |
| Shift+F9 | Switch between a field code and its result |
| ⌘+F3 | Cut the selection to the Spike |
| ⌘+F4 | Close the window |
| Option+⌘+R | Expand or minimize the ribbon |
| ⌘+Shift+F5 | Edit a bookmark |
| Option+F7 | Find the next misspelling or grammatical error. The Check spelling as you type check box must be selected (Word menu, Preferences command, Spelling and Grammar). |
| ⌘+Shift+L | Look up selected text on the Internet |
▲ up
| 2. Move the Cursor | |
|---|---|
| Move the cursor | Some Windows keyboard shortcuts conflict with the corresponding default Mac OS keyboard shortcuts. To use these shortcuts, you may have to change your Mac keyboard settings to change the Show Desktop shortcut for the key. |
| Arrow Left | Move one character to the left |
| Arrow Right | Move one character to the right |
| Option+Arrow Left | Move one word to the left |
| Option+Arrow Right | Move one word to the right |
| ⌘+Arrow Up | Move one paragraph up |
| ⌘+Arrow Down | Move one paragraph down |
| Shift+Tab | Move one cell to the left (in a table) |
| Tab | Move one cell to the right (in a table) |
| Arrow Up | Move up one line |
| Arrow Down | Move down one line |
| ⌘+Arrow Right or End | Move to the end of a line |
| ⌘+Arrow Left or Home | Move to the beginning of a line |
| Page Up | Move up one screen (scrolling) |
| Page Down | Move down one screen (scrolling) |
| ⌘+Page Down | Move to the top of the next page |
| ⌘+Page Up | Move to the top of the previous page |
| ⌘+End; On a MacBook keyboard: ⌘+FN+Arrow Right | To the end of a document |
| ⌘+Home; On a MacBook keyboard: ⌘+FN+Arrow Left | To the beginning of a document |
| Shift+F5 | To the previous insertion point |
Using Option Code Shortcuts in Mac. You can use the alt key and hexadecimal code in the second column of the above shortcuts table to insert fractions. For example, press alt + 00BE will produce the fraction number as ¾. However, you should first change the keyboard input method to Unicode Hex Input for this method to work. Use Character Viewer App. There is a keyboard command to open the Word for Mac Preferences dialog. The keyboard command is Command + Comma. Word Preferences are found in the Word Menu in the Menu Bar. Press Command + Comma to open the Word Preferences dialog with or without a document open and whether or not the document is in Full Screen view.
▲ up
| 3. Select text and graphics | |
|---|---|
| Select the first item that you want, hold down ⌘ , and then select any additional items. | Select multiple items not next to each other |
| Shift+Arrow Right | Select one character to the right |
| Shift+Arrow Left | Select one character to the left |
| Shift+Option+Arrow Right | Select one word to the right |
| Shift+Option+Arrow Left | Select one word to the left |
| ⌘+Shift+Arrow Right or Shift+End | Select to the end of a line |
| ⌘+Shift+Arrow Left or Shift+Home | Select to the beginning of a line |
| Shift+Arrow Down | Select one line down |
| Shift+Arrow Up | Select one line up |
| ⌘+Shift+Arrow Down | Select to the end of a paragraph |
| ⌘+Shift+Arrow Up | Select to the beginning of a paragraph |
| Shift+Page Down | Select one screen down |
| Shift+Page Up | Select one screen up |
| ⌘+Shift+Home | Select to the beginning of a document |
| ⌘+Shift+End | Select to the end of a document |
| Option+⌘+Shift+Page Down | Select to the end of a window |
| ⌘+A | Select to select the entire document |
| ⌘+Shift+F8 , and then use the arrow keys; press Esc to cancel selection mode. | Select to a vertical block of text |
| F8 , and then use the arrow keys; press Esc to cancel selection mode. | Select to a specific location in a document |
▲ up
| 4. Select text and graphics in a table | |
|---|---|
| Tab | Select the next cell's contents |
| Shift+Tab | Select the preceding cell's contents |
| Hold down Shift and press an arrow key repeatedly. | Extend a selection to adjacent cells |
| Click in the column's top or bottom cell. Hold down Shift and press the Arrow Up or Arrow Down key repeatedly. | Select a column |
| ⌘+Shift+F8 , and then use the arrow keys; press Esc to cancel selection mode. | Extend a selection (or block) |
| Shift+F8 | Reduce the selection size |
| Select the first item that you want, hold down ⌘ , and then select any additional items. | Select multiple cells, columns, or rows that are not next to each other |
▲ up
| 5. Extend a selection | |
|---|---|
| F8 | Turn on extend mode |
| F8, Arrow Left | Select the nearest character to the left |
| F8, Arrow Right | Select the nearest character to the right |
| Press F8 repeatedly to expand the selection to the entire word, sentence, paragraph, section, and document. | Expand a selection |
| Shift+F8 | Reduce the size of a selection |
| Esc | Turn off extend mode |
▲ up
| 6. Edit text and graphics | |
|---|---|
| ⌘+C or F3 | Copy text or graphics |
| ⌘+Shift+C | Copy a style |
| ⌘+Shift+V | Paste a style |
| Ctrl+Option+C | Copy text or graphics to the Scrapbook |
| ⌘+X or F2 | Cut selected text to the clipboard |
| ⌘+X or F2 (then move the cursor and press ⌘+V or F4 ) | Move text or graphics |
| Option+F3 | Create AutoText |
| ⌘+Option+Shift+V | Insert AutoText |
| ⌘+V or F4 | Paste the Clipboard contents |
| ⌘+Ctrl+V | Paste special |
| ⌘+Option+Shift+V | Paste and match the formatting of the surrounding text |
| ⌘+Shift+F3 | Paste the Spike contents |
| Delete | Delete one character to the left |
| ⌘+Delete | Delete one word to the left |
| ⌘ or Clear | Delete one character to the right |
| ⌘+⌘ | Delete one word to the right |
| ⌘+X or F2 | Cut selected text to the Clipboard |
| ⌘+Z | Undo the last action |
| ⌘+Y | Redo the last action |
| ⌘+F3 | Cut to the Spike |
▲ up
| 7. Align and format paragraphs | |
|---|---|
| ⌘+E | Center a paragraph |
| ⌘+J | Justify a paragraph |
| ⌘+L | Left-align a paragraph |
| ⌘+R | Right-align a paragraph |
| Ctrl+Shift+M | Indent a paragraph from the left |
| ⌘+Shift+M | Remove a paragraph indent from the left |
| ⌘+T | Create a hanging indent |
| ⌘+Shift+T | Remove a hanging indent |
| ⌘+Option+K | Start AutoFormat |
| ⌘+Shift+N | Apply the Normal style |
| ⌘+Option+1 | Apply the Heading 1 style |
| ⌘+Option+2 | Apply the Heading 2 style |
| ⌘+Option+3 | Apply the Heading 3 style |
| ⌘+Shift+L | Apply the List style when the cursor is at the beginning of a line |
| Option+Spacebar | Insert a nonbreaking space |
▲ up
| 8. Set line spacing | |
|---|---|
| ⌘+1 | Set lines as single-spaced |
| ⌘+2 | Set lines as double-spaced |
| ⌘+5 | Set lines as 1.5-line spacing |
| ⌘+0 (zero) | Add or remove one line of space directly preceding a paragraph |
▲ up
| 9. Format characters | |
|---|---|
| ⌘+Shift+F | Change the font |
| ⌘+Shift+> | Increase the font size |
| ⌘+Shift+< | Decrease the font size |
| ⌘+ | Increase the font size by 1 point |
| ⌘+ | Decrease the font size by 1 point |
| ⌘+D | Change the formatting of characters (Font command, Format menu) |
| Shift+F3 | Change the case of letters |
| ⌘+Shift+A | Format in all capital letters |
| ⌘+B | Apply bold formatting |
| ⌘+U | Apply an underline |
| ⌘+Shift+W | Underline words but not spaces |
| ⌘+Shift+D | Double-underline text |
| ⌘+I | Apply italic formatting |
| ⌘+Shift+K | Format in all small capital letters |
| ⌘+= (Equal sign) | Apply subscript formatting (automatic spacing) |
| ⌘+Shift++ (Plus sign) | Apply superscript formatting (automatic spacing) |
| ⌘+Shift+X | Apply strike-through formatting |
▲ up
| 10. Insert special characters | |
|---|---|
| ⌘+F9 | Insert an empty field |
| Shift+Return | Insert a line break |
| ⌘+Enter | Insert a page break |
| ⌘+Shift+Return | Insert a column break |
| ⌘+Shift+- (Hyphen) | Insert a nonbreaking hyphen |
| Option+G | Insert the copyright symbol |
| Option+R | Insert the registered trademark symbol |
| Option+2 | Insert the trademark symbol |
| Option+; (Semicolon) | Insert an ellipsis |
▲ up
| 11. Work with fields | |
|---|---|
| Ctrl+Shift+D | Insert a DATE field |
| ⌘+Option+Shift+L | Insert a LISTNUM field |
| Ctrl+Shift+P | Insert a PAGE field |
| Ctrl+Shift+T | Insert a TIME field |
| ⌘+F9 | Insert an empty field |
| F9 | Update selected fields |
| ⌘+Shift+F9 | Unlink a field |
| Shift+F9 | Switch between a field code and its result |
| Option+F9 | Switch between all field codes and their results |
| Option+Shift+F9 | Run GOTOBUTTON or MACROBUTTON from the field that displays the field results |
| F11 | Go to the next field |
| Shift+F11 | Go to the previous field |
| ⌘+F11 | Lock a field |
| ⌘+Shift+F11 | Unlock a field |
▲ up
| 12. Outline a document | |
|---|---|
| Ctrl+Shift+Arrow Left | Promote a paragraph |
| Ctrl+Shift+Arrow Right | Demote a paragraph |
| ⌘+Shift+N | Demote to body text |
| Ctrl+Shift+Arrow Up | Move selected paragraphs up |
| Ctrl+Shift+Arrow Down | Move selected paragraphs down |
| Ctrl+Shift++ (Plus sign) | Expand text under a heading |
| Ctrl+Shift+- (Minus sign) | Collapse text under a heading |
| Ctrl+Shift+A | Expand all body text and headings or collapse all body text |
| Ctrl+Shift+L | Show the first line of body text or all body text |
| Ctrl+Shift + | Show all headings with the specified heading level |
▲ up
| 13. Review a document | |
|---|---|
| ⌘+Option+A | Insert a comment |
| ⌘+Shift+E | Turn track changes on or off |
| Home | Go to the beginning of a comment |
| End (The End key is not available on all keyboards) | Go to the end of a comment |
| ⌘+Home | Go to the beginning of the list of comments when in the Reviewing Pane |
| ⌘+End | Go to the end of the list of comments when in the Reviewing Pane |
▲ up
| 14. Print a document | |
|---|---|
| ⌘+P | Print a document |
▲ up
| 15. Move around in a table | |
|---|---|
| Tab (If the cursor is in the last cell of a table, pressing Tab adds a new row) | Move to the next cell |
| Shift+Tab | Move to the preceding cell |
| Arrow Up or Arrow Down | Move to the preceding or next row |
| Ctrl+Home | Move to the first cell in the row |
| Ctrl+End | Move to the last cell in the row |
| Ctrl+Page Up | Move to the first cell in the column |
| Ctrl+Page Down | Move to the last cell in the column |
| Return | Start a new paragraph |
| Tab at the end of the last row. | Add a new row at the bottom of the table |
| Return at the beginning of the first cell | Add text before a table at the beginning of a document |
| ⌘+Ctrl+I | Insert a row |
▲ up
| 16. Resize table columns by using the ruler | |
|---|---|
| Shift | Move a single column line; Retain table width. |
| ⌘+Shift | Equally resize all columns to the right; Retain table width. |
| ⌘ | Proportionally resize all columns to the right; Retain table width. |
▲ up
| 17. Resize table columns directly in a table. | |
|---|---|
| To display a column's measurements in the ruler when you resize the column, press Option with these shortcut keys. To finely adjust a column width, turn off snap-to functionality by pressing Option with the shortcut keys. | |
| No key | Move a single column line; Retain table width. |
| Shift | Retain column sizes to the right; Change table width. |
| ⌘+Shift | Equally resize all columns to the right; Retain table width. |
| ⌘ | Proportionally resize all columns to the right; Retain table width. |
▲ up
| 18. Insert paragraphs and tab characters in a table | |
|---|---|
| Return | Insert a new paragraph in a cell |
| Option+Tab | Insert a Tab character in a cell |
▲ up
| 19. Use footnotes and endnotes | |
|---|---|
| ⌘+Option+F | Insert a footnote |
| ⌘+Option+E | Insert an endnote |
▲ up
| 20. Right-to-left language features | |
|---|---|
| Ctrl+⌘+Arrow Left | Paragraph direction to right to left |
| Ctrl+⌘+Arrow Right | Paragraph direction to left to right |
▲ up
| 21. Function key shortcuts | |
|---|---|
| Word 2016 for Mac uses the function keys for common commands, including Copy and Paste. For quick access to these shortcuts, you can change your Apple system preferences so you don't have to press the Fn key every time you use a function key shortcut. | |
| F1 | Undo the last action |
| F2 | Cut selected text or graphics |
| F3 | Copy selected text or graphics to the clipboard |
| F4 | Paste the Clipboard contents |
| F5 | Choose the Go To command (Edit menu) |
| F7 | Open the Spelling and Grammar dialog box |
| F8 | Extend a selection |
| F9 | Update selected fields. |
| ⌘+F6 | Go to the next window |
| Shift+F2 | Copy selected text |
| Shift+F3 | Change letters to uppercase, lowercase, or mixed case |
| Shift+F4 or ⌘+Shift+F4 | Repeat a Find or Go To action |
| Shift+F5 | Move to the previous insertion point |
| Shift+F7 | Open the Thesaurus pane |
| Shift+F8 | Shrink a selection |
| Shift+F9 | Switch between a field code and its result. |
| Shift+F11 | Go to the previous field |
| ⌘+F3 | Cut the selection to the Spike |
| ⌘+F4 | Close the window |
| ⌘+F6 | Go to the next window |
| ⌘+F9 | Insert an empty field |
| ⌘+F11 | Lock a field |
| ⌘+Shift+F3 | Insert the contents of the Spike |
| ⌘+Shift+F5 | Edit a bookmark |
| ⌘+Shift+F7 | Update linked information in a Word source document |
| ⌘+Shift+F8+ Arrow Key | Extend a selection as a block selection |
| ⌘+Shift+F9 | Unlink a field |
| ⌘+Shift+F11 | Unlock a field |
| Option+F3 | Create an AutoText entry |
| Option+F7 | Find the next misspelling or grammatical error |
| Option+F8 | Run a macro |
| Option+F9 | Switch between all field codes and their results |
| ⌘+Shift+L | Look up selected text on the Internet |
| Option+Shift+F9 | Run GOTOBUTTON or MACROBUTTON from the field that displays the field results |
▲ up
Updated for Word 2008 (DRAFT in Progress)
Contents
- Spelling FAQ
- Change Language in a Single Click in Word 2008 (external link, scroll down for English)
- Known Bugs
Note: the Word 2004 Help topic 'Troubleshoot spelling and grammar checking' also addresses some questions not covered here.
Spelling Fixes
Spelling depends on the language setting, so first make sure you have a Tools>Language menu entry. If not, see here.
Fixing All Documents, or Changing the Default Language
You need to modify the style that the text is formatted in, to include the language formatting. Then anytime you use that style in the future, it will automatically have the language tags. New documents will behave, although you will need to fix old documents one-by-one.
Change the Normal Style
Go to Tools>Language, select a Language, and click Default.
Word will automatically add that language tag to your Normal style, which is the default style for text in a new blank document. Be sure the 'do not check spelling or grammar' box is NOT checked. Word will ask you to confirm that you want to change the setting for new documents—answer yes. If on quitting Word, you get a 'save changes to Normal' question, answer yes.
ConnectWise Control supports the use of all iOS devices to support remote guests. Connect to Windows, Mac, or Linux machines. App features include central toolbox, quality settings, reboot and reconnect, manage credentials, chat and much more. ConnectWise Control mobile client can be downloaded free from the iOS App Store. Connectwise manage client install. If you're looking for a better remote computer support experience, you've come to the right place. Download ConnectWise Control here. The official ConnectWise Control app lets you instantly connect to and remotely control devices, bringing the power and convenience of ConnectWise Control to your iPhone or iPad. You don’t have to be tethered to your desk to resolve support issues or gain access to your work or personal devices.
If More Action is Necessary
- Click in a word that is not being spell-checked, and go to Format>Style. The style of that word will already be selected in the left column of the dialog.
- Click Modify. Check the “add to template” box to save your changes to all new documents based on that template, but do NOT check the “automatically update” box.
- Use the Format drop-down menu at the bottom of the Modify dialog to select Language—select the Language you want, and make sure the 'do not check spelling or grammar' box is NOT checked.
- Click OK to exit the Language dialog, then OK to exit the Modify Style dialog, and either Close or Apply to exit the Format>Style dialog.
Fixing Single Documents or Documents Created Earlier
First Check the Language Formatting
Select all the text, go to Tools>Language, select the desired language, uncheck the “do not check spelling or grammar” box if necessary, and hit OK. Be sure to Select All the text first! Now it should work.
If the “do not check spelling or grammar” box has a dash in it, this means part of your text is tagged “do not check.” Click twice to clear completely.
If your document uses more than one language, when you Select All and go to Tools>Language, you will see that no language is highlighted. Let it stay that way. Just click the 'do not check spelling and grammar' box until it is completely clear, and that will remove the 'do not check spelling and grammar' formatting regardless of which languages are applied to the text, and will not change your language formatting.
If Necessary, Check the Preferences
In Word> Preferences> Spelling & Grammar, make sure the box labeled 'Hide spelling errors in this document' is UNchecked (and ditto for the similar box for grammar).
You might also click the Check Document button while there, then recheck the spelling. It's possible that during a previous spell check the Ignore/Ignore All option was used.
Fix Old Documents
You can use either the direct formatting method of Select All, go to Tools>Language, and apply a language and clear the 'do not check' box; or the style-based method of redefining the style in each old document.
None of Those Fixes Worked? Check Your System Setup
If you continue to have problems, you may need to check the system settings. Go to System Preferences>International>Input Menu and ensure the languages and keyboard you want to use are installed and enabled (UK is under British, by the way).
Look on your Menu Bar for the flag for the language you want to use (e.g. if you are using 'English Australian', there should be an Australian flag there.) If either of these is wrong, Word may be asking for dictionaries that may not exist. This should not be necessary to switch languages on a regular basis, but may be a one-time only aid.
A few individuals run into problems when they want the default language for Office documents to be different from the default language settings in the OS. A contributor to Mac OS X Hints has posted his workaround here, after finding difficulties getting Word to default to UK English while he was using an Irish keyboard layout in the OS.
Download game luxor 3 for mac. As a member, you'll enjoy unlimited play on hundreds of download games, ads-free gaming, and brand new titles each week — as many as 20 new games per month!Looking for more? Shockwave is the premier destination for and premium download games.Gamers looking to have some serious fun can subscribe to. Shockwave adds games frequently so there are always new games available.
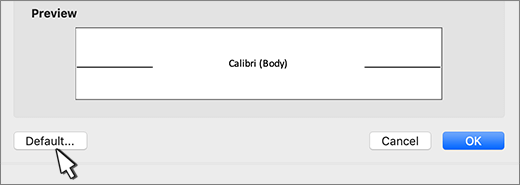
Word 2008 has a preference to 'match font with keyboard' (Word>Preferences>Edit). Unchecking this has helped in related cases.
Still Broken?
It's rare that this is the problem for English speakers, but make sure the proofing tools are actually installed. Look here:
- Word 2008: Applications/Microsoft Office 2008/Office/Shared Applications/Proofing Tools
- Word 2004: Applications/Microsoft Office 2004/Shared Applications/Proofing Tools/
Set the Default Language
Go to Tools>Language, select your language, and click Default. This will affect all documents created from then on. You'll need to fix old documents one-by one. (If you don't have a Tools>Language entry, see here.)
You are highly advised to read How Spell-Checking Works in Word, as the notion of a 'default language' doesn't exactly apply to Word.
Spell-Check Doesn’t Catch Misspelled Words
For Word to spell-check, whether by using the Tools>Spelling & Grammar dialog, or by showing red underlines for the “check spelling as you type” function, you need to tell it which language you are using.
As a test, click in a word that isn’t being spell-checked. Go to Tools>Language and see what language the “Mark Selected Text As” blue selection bar is highlighting, and if the 'do not check spelling or grammar' box is checked. Note: Older versions of Word (Word 98, Word 2001, Word X) do not have a “do not check spelling and grammar” box. Instead the language list contains a “(no proofing)” option at the very top, which behaves similarly.
- If the language doesn't match the one you think you are using, Word won't catch errors.
- If the 'do not check spelling or grammar' box is checked, Word won't catch errors.
If Tools>Language shows settings you don’t want, here’s how to fix it. If you don't have a Tools>Language entry, see here.
The Mysterious 'No Proofing' Message
Sometimes when you run Tools>Spelling & Grammar, Word will give you the following dialog message after the spellcheck is complete.
The spelling check is Complete. Text set to (no proofing) was skipped. To find (no proofing) text, click Edit/Replace, click More, click Format, click language and choose No proofing.
Word spellchecks according to the language formatting that has been applied to the text. You can see what language the text is formatted in by going to Tools>Language and seeing what comes up highlighted. If you receive the above message, it means that some of the text is formatted without a language, or as No Proofing. Word is giving you instructions on how to find that text, so that you can reformat it. Note: If you don't have a Tools>Language entry, see here.
Now, in recent versions, this message is actually incorrect. Versions of Word prior to Word 2004 had (no proofing) listed as equivalent to a language, so that it was possible to have text with no language formatting at all. In Word 2004, the equivalent of (no proofing) is checking the 'do not check spelling and grammar' box in Tools>Language, which is a format layered on top of language formatting. So in Word 2004, when it says search for (no proofing) text, really you need to search for text with that 'do not check spelling and grammar' box checked. In earlier versions, you would search for a Tools>Language setting of (no proofing).
However, you can ignore this message entirely. Just jump to the Fixes section for the regular remedies.
How Spell-Checking Works in Word
Common Misconceptions
The Word>Preferences>Spelling and Grammar item labeled 'Dictionaries..' only relates to custom dictionaries, and nothing else. Making changes there will not help solve a spellchecking problem.
The Encarta dictionary, which you access via Tools>Dictionary or the Toolbox when looking for definitions of words, has nothing to do with spellchecking at all.
Fundamental Fact: Correct Spell-Checking Depends on a Correct Language Setting
Language is a text property, like bold, or italic. It is not a program-level setting, so you cannot set a preference to tell Word to use UK English, or set an active dictionary to UK English. Instead, you have to make sure that the text is tagged as UK English (or whatever language you are interested in).
This approach is actually more powerful, as it provides the flexibility to use multiple languages in the same document and have all those words spellchecked properly. However, it can be quite confusing, as it may mean that you have to change text formatting in multiple places instead of just changing one setting.
So how do you tag the default text with the correct language? Well, first you need to understand where default text comes from. New documents in Word, created by cmd-n or File>New Blank Document, are based on the Normal template. The Normal template already has an empty paragraph in it. Regular new documents are more or less copies of the Normal template.
Usually, that empty paragraph is formatted in the Normal style. So to change the settings for that, you would change the language setting for the Normal style. When you go to Tools>Language, select a language, and click Default, that is exactly what Word does, making it a little easier for you. So you can do that. Note: If you don't have a Tools>Language entry, see here.
Changing the Normal style, however, only takes effect for new documents generated from the Normal template. It will not change already created documents, so you will need to do that manually. In addition, if you are using any other templates, you may need to change the language formatting for those templates as well. Please jump to the Fixes section for details on how.
Why Does Spell-Checking Go Bad?
In single documents, one common reason is pasting in text from the web or another document, which has a different language formatting. That text will carry its formatting unless you use one of the Paste Options (new in Word 2004), and if you continue typing and hitting enter from that text, the same formatting will apply to your new text.
In versions earlier than Word 2004, new styles created from scratch were set to (no proofing) unless you specifically assigned them a language.
Check Spelling in a Different Language
First make sure you installed the proofing tools for the language. Look here:
- Word 2008: Applications/Microsoft Office 2008/Office/Shared Applications/Proofing Tools
- Word 2004: Applications/Microsoft Office 2004/Shared Applications/Proofing Tools/
to see what proofing files are already installed.
If you don't see the language you want, check the unofficial list of the proofing tools in Office 2008 and 2004. If the languages you want are on the list, but not in your Proofing Tools folder, go back to the install CD and try installing the proofing tools for that language, using the Custom Installer. Office 2004 offers more proofing tools than Office X. For versions earlier than Office 2004, additional language proofing tools are hidden in the Value Pack on the CD. Note that MacWord offers spell-check for many languages, but will only check the grammar for a few, and will not offer definitions for anything but English.
If you do see the desired language files in the Proofing Tools folder, then you need to make sure that you specifically tell Word what language the text is. To do so, select text, go to Tools>Language, select the desired language, and click OK. If you are in Word 2004 or 2008, make sure 'do not check spelling or grammar' box is completely clear, no hyphen or anything. (If you don't have a Tools>Language entry, see here.)
Once the text is properly tagged, Word will automatically use the correct proofing tools when you right-click (control-click) or when you run Tools>Spelling & Grammar, even if your sentences mix more than one language.
If you are changing languages in a lot of documents, it may be easier to record a macro to apply the language as direct formatting; or to use a style that includes the language formatting; or to create a template that has the default set to your preferred language. For Word 2008, see Corentin Cras-Méneur's tips on creating a script to easily switch languages.
It is possible to tag text with a language that you don't actually have installed, as the Tools>Language dialog will list languages that you do not have proofing tools for. Word will just completely ignore this text. It will not be spell-checked, and Word won’t even give you a message that some text was skipped, as it would if some text were tagged “do not check spelling and grammar.” So be careful not to make that mistake. However, different versions of Word have different proofing tools available. If you tagged a language Czech, and then sent it to a Windows-using friend who did have Czech proofing tools installed, your friend should be able to spellcheck the text.
The Spelling & Grammar Preferences Are Grayed Out
If the Spelling & Grammar section of Word>Preferences is grayed out, this is probably due to a corrupt Preferences file. See here for Word X/2004/2008 and here for Word 98/2001.
If only the Grammar section is grayed out in Word>Preferences, Spelling & Grammar pane, this may be because you have assigned a language that MacWord doesn’t have grammar tools for, such as Dutch. Oddly, even if you assign a language that MacWord doesn’t have any proofing tools for, such as Turkish, the Spelling Preferences will not be grayed out.
The Add Button Is Grayed Out
The “Add” button in the Tools>Spelling & Grammar dialog, or in the right-click menu, may be grayed out. This is probably because you don’t have a Custom Dictionary established.
You need to enable a custom dictionary, as the words you Add go into your personal custom dictionary. In Word>Preferences>Spelling & Grammar, click on Dictionaries.. to manage custom dictionaries. The checked ones are loaded. If there is nothing in the list, you may need to create a custom dictionary (click New in the dialog).
If you assigned the custom dictionary a language, then Add may be grayed out because the language assigned to the word does not match the language assigned to the dictionary. The custom dictionary does not require a language, and if you don’t assign a language, the custom dictionary can mix together words of any language. For that reason, set the language of the custom dictionary to “none” whenever possible. A bug involving a Spanish custom dictionary has been fixed in Office 11.2.
Word’s Help on “custom dictionary” is actually rather helpful, at least in Word 2004.
There Is No 'Language' on My Tools Menu
If you don't see an entry for Language in the Tools menu, it's probably because you have Word 5.1 Menus enabled. Look under View. If you see an entry for 5.1 Menus, uncheck it. The entry will vanish.
This is also the explanation for a missing View>Formatting Palette, and various other menu oddities.
Word 2004 has had a rash of complaints about 5.1 Menus being enabled because the simple keyboard shortcuts control-5 and control-8 turn them on. You can unassign this shortcut key through the Tools>Customize dialog, if you want to prevent this happening. The command you need is 'Word5Menus' and it is listed under the category 'Window and Help'. If you are not familiar with Tools>Customize, see here.
Some Known Bugs
If you have additional information on these bugs, or suggested workarounds, please post a message on the the Microsoft's Answers site.
Do You Have a Custom Dictionary with the Language Set to Spanish?—FIXED!
FIXED in Office 2004 SP2 with the 11.2 updater! Previously, a bug in the Spanish proofing tools prevented you from using a custom dictionary with the language set to Spanish. After installing the 11.2 update, you should be able to use a Spanish custom dictionary.
German Hyphenation Makes Word Crash
Word 2004—at present it is not confirmed whether this has been fixed in Word 2008, or by an update to Word 2004.
If you are using German documents and have automatic hyphenation turned on, Word may crash. It appears that an update for Word 2004 corrupted the German Hyphenation files (around 11.2). You can fix the problem by re-installing older German Hyphenation files.
Quit all Office programs. Look in the folder Applications/Microsoft Office 2004/Shared Applications/Proofing Tools/ and trash the following three files:
- German Hyph Dict (post-reform)
- German Hyph Dict (pre-reform)
- German Hyphenation
Replace them with the identically named files from the Office 2004 CD, or even the Office X CD.
Thanks to forum posters here and here for this information.
The Tools>Spelling & Grammar Dialog Stops Showing Suggestions

This bug has been confirmed in Word 2004, up to and including the Office 11.2.1 update. If you are spell-checking long documents, and hit Change All a few times, eventually the suggestions window in the Spelling & Grammar dialog will stop showing new suggestions. Word will actually carry on spell-checking in the background, but you can’t see the words it suggests because the dialog stops refreshing. The only way to fix this problem is to exit the dialog and start over—or avoid clicking Change All. Using Find and Replace instead may be a possible workaround.
In this case, long documents are defined as about 100 pages or more.
This bug appears to be fixed in Word 2008. It may have been fixed with an earlier update in Word 2004, so run Help>Check for Updates in that program.
If you see this bug in Word 2008, please post on the Mac Word Microsoft Answers Site and let the MacBU know by using Help>Send Feedback in Word.
My Exclude Dictionary Doesn’t Work
It doesn't work for anyone. The feature is broken in Word 2008, Word 2004, and possibly Word X.
In fact, if you follow the directions in Word 2004 Help for “specify a preferred spelling for a word,” you will find that you have loaded your exclude dictionary as a custom dictionary and that all those words you meant to exclude are now being read as correct.
Possible workaround: create your own custom entries in Tools>AutoCorrect to change words that you would normally add to an exclude dictionary. AutoCorrect is language-dependent, so that you can set words to AutoCorrect when typing in one language but not in another.
Please use Help>Send Feedback in Word to let the MacBU (Macintosh division of Microsoft) know that you need an exclude dictionary. Explain to them why you need it and how you use it.
For versions earlier than Word 2004, Word’s Help on “exclude dictionary” is actually quite good. Start there if you are having problems.