Free Stair Design Software For Mac
Radiance is a free, highly accurate ray-tracing software system for UNIX computers. It is a suite of programs designed for the analysis and visualization of lighting in design. Radiance is superior to simpler lighting calculation and rendering tools in that there are no limitations on the geometry or the materials that may be simulated.
QUESTION
I have a set of stairs which start or meet at an odd angled landing. How can I model this in Home Designer?
ANSWER
You can draw a variety of stair sections joined by a landing, including T-shaped staircases, U-shaped staircases, as well as many more unconventional styles using the stair tools within your Home Designer Software.
If you only have two stair sections that need to be connected, you can easily create the stair landing between them with a single click.
Editing a Stair Landing in Home Designer software is much like editing other closed polyline-based objects such as Custom Countertops, Terrain Features, etc.
There are a few things to keep in mind when drawing stairs:
- Before stairs are created, make sure that the heights for both the lower and upper floors are correctly defined.
- Stairs are drawn going UP, so they should be drawn from the lower of the two floors they connect.
- Stairs adjust their riser and tread dimensions to connect two floor heights if possible. The rise and run are calculated so that the steps are consistent in size.
- If you have the Reference Display turned on, stairs snap to the reference display.
- If a stairwell room has been defined on the floor above, the top of the stairs can be dragged until it stops at the railing or wall defining the stairwell.
To create a stair landing automatically
- First, launch Home Designer and Open the plan in which you would like to create your irregularly shaped landing.
- Select Build> Stairs> Draw Stairs , then click and drag to create your first stair section, starting at the bottom and drawing upward.
- Using the Select Objects edit tool, select the straight stair section, then click on the Change Line/Arc edit tool to make this section curved.
- Next, draw in your second section of stairs in the same manner, approximately where they should be in relation to the first set of stairs.
- With the Draw Stairs tool still active, click in between the two stair sections.
- You can see that instead of a standard rectangular landing, the two stairs are connected with the appropriate landing shape and size.
Once you have a landing placed in your plan, it is easy to edit it into almost any shape by selecting it and using the Change Line/Arc and Break Line edit tools. Below is an image with some of the edit handles you may want to familiarize yourself with before editing stair landings.
If you are unfamiliar with the functions of these edit handles within your software, select the Help menu and click on Launch Help to display the software's searchable help menu.
From its two-degree closed face, to its enormous head, to its soft-feeling grip, reinforced graphite shaft, and affordable sticker, this club practically spells out “forgiveness.”. And call me crazy, but Dunlop’s LoCo driver, a 450cc behemoth, just may in fact be a high handicapper’s gift from the gods. .Building on the success of its popular low compression golf ball, Dunlop’s LoCo driver is the next in a series of products intended to make the game more accessible and more enjoyable for the “average” golfer. Dunlop loco pro driver for mac windows 7.
To edit the shape and size of a stair landing
- To change one of the segments of the landing into an arc, choose the Select Objects tool, and click on the edge of the landing that you want to change.
- Select the Change Line/Arc edit tool.
- You can also use the Change Line/Arc edit tool on straight stair sections to change them into curved stair sections.
- Note that only the edge that you selected will change. You will need to select each edge you want to turn into an arc and use its edit handles to reshape it appropriately for your particular custom landing shape.
- You can also use the Change Line/Arc edit tool on straight stair sections to change them into curved stair sections.
- The Break Line edit button can be used to create a new corner edit handle at the location of the break.
- Break points are also referred to as joints, nodes or pivot points.
If you happen to place more breaks than are necessary for your stair landing, you can easily remove them by selecting the diamond edit handle at the break and dragging it over to the next diamond edit handle. Alternatively, you can select the Simplify Polyline edit tool when a landing is selected to remove unused break points. - Another reason to place a break would be if you needed to have two stair sections connected to the same edge of a landing, and have received the following error message: 'Only one stair section can connect to a single landing edge. Select the landing and use the Break Line edit button to break the landing edge so each stair section has its own landing edge to connect to.'
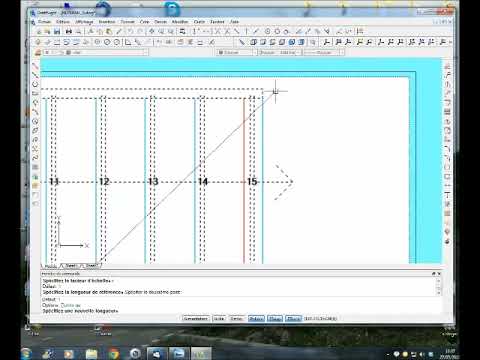
To resolve this warning, select the Break Line edit tool and click at the location on the landing in between where the two stair sections will be before placing the second stair section, as demonstrated in the image below.
Notice that you do not need to move this edge of the landing, simply placing a break at the correct location creates the necessary extra edge to which the stair section can attach.
- Break points are also referred to as joints, nodes or pivot points.
- Continue modifying the stair landing until it is the desired size/shape.
To create an independent stair landing
- Select Build> Stairs> Landing , then click and drag out a basic rectangular landing.
- Use the methods described earlier in this article to customize its size, shape, and position.
- Once the landing is to your liking, use the Select Objects tool to select it, then click on the Open Object edit tool.
- On the General panel of the Stair Landing Specification dialog that displays, you can modify the thickness and height of the landing, as well as whether or not you want railings to generate on each edge.
- Uncheck Auto Adjust Height When Connected to Stairs and set the desired Top Height value.
- Uncheck Auto Adjust Thickness When Connected to Stairs and set the desired Thickness value.
- Select the appropriate railing options under the Selected Edge section.
- Select Automatic to suppress the railing on any portion of the selected edge that either connects to a stair section or has an adjacent landing, but to produce a railing where that is not the case.
- Select No Railing to suppress the railing on the selected edge of this landing.
- Select Has Railing to produce a railing along the selected edge, even where it connects to a stair section or has an adjacent landing.
- Check Apply to All Edges to apply your selection to all edges of the landing. This is an action rather than a state - the next time this dialog is opened, this box will be unchecked.
When you click on a polyline- or box-based object, the edge that you click nearest becomes the 'selected edge' and displays an edit handle larger than those on other edges. A4tech camera driver. The handle on this edge may also display at the point where you clicked to select it.
- Select Automatic to suppress the railing on any portion of the selected edge that either connects to a stair section or has an adjacent landing, but to produce a railing where that is not the case.
- Uncheck Auto Adjust Height When Connected to Stairs and set the desired Top Height value.
- If railings are specified for the landing, you can adjust the railings properties on the Railing and Newels/Balusters panels of the Stair Specification dialog.
- Once all desired changes have been made to the landing, click OK to close the dialog.
- You can add additional landings at the top or bottom of stair sections, or even up against other landings, and the heights will adjust automatically.Note: Multiple landings can be used to create custom situations that may not be possible with the other Stair tools. For example, if you want to simulate multiple stair treads that all have a different width or height, you can use independent landings, and adjust their properties individually.
Interior designers are trying to come up with new tools so that it will be able to create unique designs for furniture. They will be able to do that with the help of certain furniture design software free download. Some of the best furniture design software will have advanced tools that will make the process easy. These free furniture design software are free to use and cabinet design software can be used for designing cabinets.
Related:
Wood Designer
This premium software can be used for creating furniture and stairs. All the designs can be viewed in 3D and price of the project can be obtained. Expert review of the project can be done and the designs can be sent to suppliers for approval of parts and machine items which will be ready for assembling. It can be used by designers and architects for optimizing the manufacturing workflow and multiple projects can be managed.
Vectorworks Designer
This premium software can be used for architecture, landscaping, and entertainment designs. It will allow designers to draft the models and present them in a single interface. It will help in enhancing the workflow and explore ideas. All the process will be simplified so that better designs can be created.
Cabinet Designer
This software can be used for free to design furniture of different shapes and sizes. Auto draw feature can be used to complete the plans in 2D and 3D. CNC files, cutting lists and price list can be obtained instantly. It will enable designers to work faster and improve the quality of the design by eliminating errors. 3D presentations can be done with the designs and better prices can be obtained.
SketchList 3D
This premium Mac software is an integrated modeling software that can be used by woodworkers. It is a virtual design tool that will enable designers to work by manipulating the 3D objects. All the items can be dragged and dropped onto the screen and it can be customized. Optimized sheet, board layout diagram, and reports are created in the background when the drawing is being created.
CAD Pro Drafting Software
This premium software can be used on the Windows platform to design, visualize and then document the furniture designs. It has many features that will allow users to design blueprints of different types of modern furniture. Cabinet boxes, Dovetail drawers, face frames, raised panel designs and much more can be created using this.
Master Design Furnish
This free Android app can be used as a complete furniture solution for designing till production. Rooms can be drawn and furnishing can be done. Aerial view of the environment can be acquired and the camera can be positioned. Furniture can be personalized and finishing can be done for the kitchen, toilets, office and much more.
SketchUp
This software can be used to create 2D documents and finding 3D models. It will allow users to add model views on the pages and drawing scales can be fixed. Line weights can be adjusted and dimensions can be added. Graphics and callouts can be done.
How to Install Furniture Design software?
This software can be used for creating furniture designs based on what is needed and visualizing it is in 3D. The software should be decided and then the system requirements can be checked to make sure that the software will run smoothly on the system. If any additional software is required then it has to be installed. The furniture design software can then be installed by using the download link and stored in the desired location. You can also see Floor Design Software.
This software can be used for designing the furniture that will go into the room based on the measurements that are required. The designs that are created can be shared or saved in the form of a PDF and some software will allow users to generate the pricing list based on the material that is used for the designs.